
Here's another view.


Then cut them out and traced them on some particle board that I had.


 After cutting the letters out on the scroll saw, I put them on cardboard on top of push pins. This keeps them off the surface for easy staining and drying. I used ebony wood finish and applied 2 coats.
While those letters were drying, I used the same stain on the beadboard. I really like the aged gray color I got with the stain on the beadboard.

 It got a light sanding to reveal a little of the white.
 Next I used some Liquid nails to glue the pieces together. The beadboard was put together along the grooves, then the letters glued on top. It took me a while to decide the exact orientation I wanted with the letters.

 Here's them laid out. I made the ampersand bigger on purpose.
After everything was glued down, I covered it with a layer of plastic to protect the wood, then something heavy to keep things glued down tight and let it dry overnight.
Attach your hanging hardware and done!

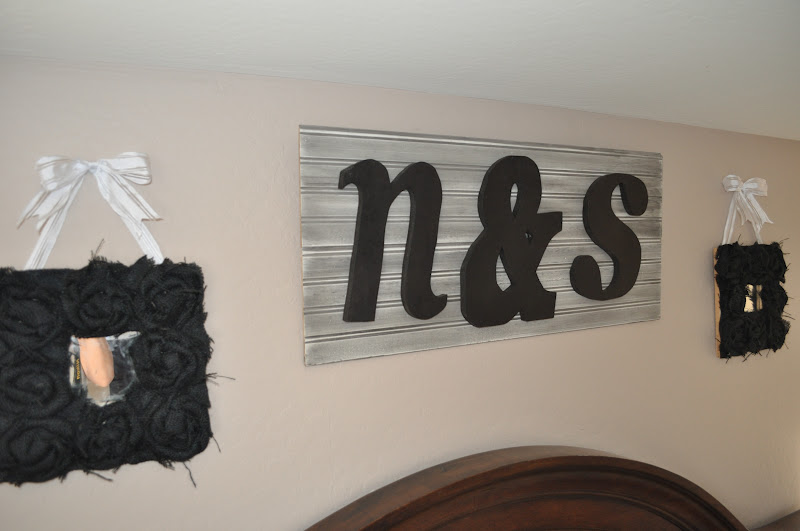
 I added some black burlap rosettes to the mirrors from Ikea as accents to the beadboard sign.
I am in the process of changing my bedding. I will share as the pieces come together.
I'm so excited! It's going to be gorgeous!

0 comments:
Post a Comment