This post is so photo heavy!
I apologize in advance but hopefully all the pictures will answer all of your questions!
If not, fire away!
You will need:
3 coordinating fabrics (fat quarter or smaller will work)
1 piece of batting
1 button
6 inches of thin elastic
Felt
Printed template (you can download it here)
Use the template to cut your cover fabric and your inside fabric
Then fold template on line
And cut your third piece of fabric for the pocket
You'll have one cover, one inside and one pocket
Fold your pocket fabric in half lengthwise and sew down the creased side. That way your pocket looks good from the outside and the inside.
See?
Cut your piece of batting to the size of the full template
Pin cover fabric to the batting,
and quilt as desired.
I ended up doing a diamond pattern and then played around with some embroidery.
Try stitching your initials, add ribbon or ricrac. Make it yours!
Sew your button on the right hand side about an inch in from the side.
Tie a knot in your elastic.
Place loop facing in on the left side.
Lay your pocket on top.
MAKE SURE THE RAW EDGE IS ON BOTTOM.
You'll cry if you don't.
Stitched edge up? Check!
Lay your inside fabric on top of the stack.
If it has a print, make sure the print is facing the inside of the sandwich, NOT you.
Pin Pin Pin.
And then sew a 1/4 inch seam all the way around, making sure to leave an opening.
Once sewn, snip your corners.
This step is optional but to make it sturdy you can serge the edge.
The easiest way to do this is set your machine on a zigzag stitch and let the needle only catch the side of the fabric and fall off on the other half of the zag.
Goodness that is confusing.
Pull your needle book right-side out.
Use a pencil, crochet hook, bobby pin, whatever you like to poke the corners out.
Iron the book nice and flat, tucking in the opening flap to match the seam.
Do a 1/4inch top stitch all around the edge of the needle book.
This will sew up your opening and give the book a nice, clean look.
See?
Cut your felt to 3 1/2 inch by 7 inch strips.
I had 3 strips total.
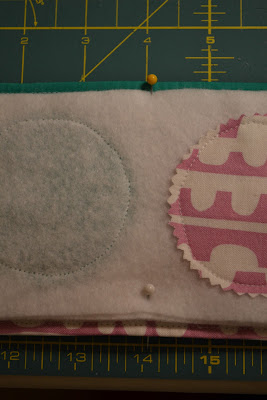
Embellish them any way you like.
I cut 2 1/2 inch circles and sewed them on.
Pin your pages in your book,
and sew down the center.
Yay! It's finished!
I made the one below the exact same way.
Only for the cover fabric I pieced scraps together for a quilted look.
I just kept sewing until I had a full piece of fabric the size of the template.
And of course if you have any questions I am happy to answer them!
Happy crafting!


0 comments:
Post a Comment