I cannot express to you how flipping excited I have been about this project! I finished it this Tuesday and it's been killing me not to show you! Seriously, I may have given myself an ulcer!
When Jane first asked me to do a piece on sprucing up a fleamarket find, I immediately thought of junk. Not that you can't find some amazing finds at flea markets, but I thought of all the "junk" pieces people find and turn into cool pieces of art.
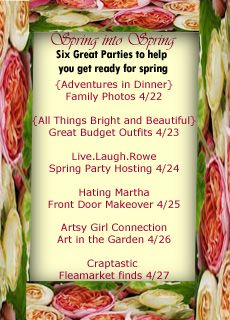
So here is my interpretation of fleamarket finds for the Spring Into Spring party!
I got a pair of pallets from my Mom when she had some work done on her house. As usual, they sat in my garage for a few months before I finally decided what to make with them.
This little flower bed on the front of our house has been an eyesore to me:
It's not really terrible, but the flowers in the back didn't get as tall and wide as we had hoped, so we had to stare at this HUGE, blank, cement wall. Blech!
So I decided to use this pallet to spruce the area up!
This is the pallet I used to make my planter. This is the view from the back. Keep in mind all pallets are a little different, so you might have to make adjustments if you make your own.
I attacked the pallet kinda spur of the moment, so I didn't get any action shots. Instead I've used my fancy paint thing to show you what to do.
Before you begin, PUT ON GLOVES! I'm finding new blue splinters every day!
When placed horizontally the pallet is too tall for my space. So I cut off part of the top to shorten it. I used my jigsaw and cut where the arrows are.
The piece I cut off looked like this. There was a single, larger board on the back and two smaller boards on the front. Again, I used my jigsaw and cut where you see the red lines. This reduced the large back piece into three small boards. I then used a hammer and knocked the remaining pieces of wood off the two front boards.
When finished I had the two front pieces, and three smaller back pieces.
I just used a hammer and some nails to attach the three smaller pieces under the top board on the back as seen in the picture above. This makes the three upper areas like boxes so I can actually plant something.
I then took one of the front pieces and nailed it to the bottom of the pallet. Again, this creates three lower boxes so I can plant.
I used a custom mix of paint and did a sort of dry brush. I didn't sand or seal the paint because I want it to naturally chip off.
Now you're ready to put in plastic.
I cut up a large trash bag and put a piece in each compartment. I then added a little bit of potting soil and trimmed the front of the garbage bag to be flush with the front edge. I folded the back of the garbage bag over itself so it would be flush with the soil.
Now you plant your beauties!
The green plants are sweet potato vines. I've been dying to plant some of these! They cost $4 for a container of two. I love how the green looks with the blue!
I have no idea what the other flowers are, but they're a trailing annual. I bought two six packs for $2 a pack. Eventually they'll be spilling over the sides!
I am so stinking in love with this thing! It really brightens up this flower bed and breaks up the wall!
So far the trailing annuals are doing great - some of them have even bloomed already! The potato vines are having a harder time adjusting - so I'll keep you updated on how they all hold up!
Hopefully in a few weeks all the plants will be cascading down the pallet!
I hope you've had a chance to check out all the spring inspired projects this week!
Now it's your turn to show off all your awesome spring junk! I can't wait to see what you've been working on!
Cheers!
 Last night we had a "date night" to make up for missing last week. I wanted to go to a movie, so of course we went to Bravo Farms in Tulare first. I got the Tomato Basil Pizza, with Pesto and a bit of Balsamic dressings as the sauce. I told them extra basil. I LOVE basil! The crust is super thin and really crispy!


.JPG)


