Showing posts with label Painting. Show all posts

Sunday, October 21, 2012

Stereo Cabinet into Toy Box

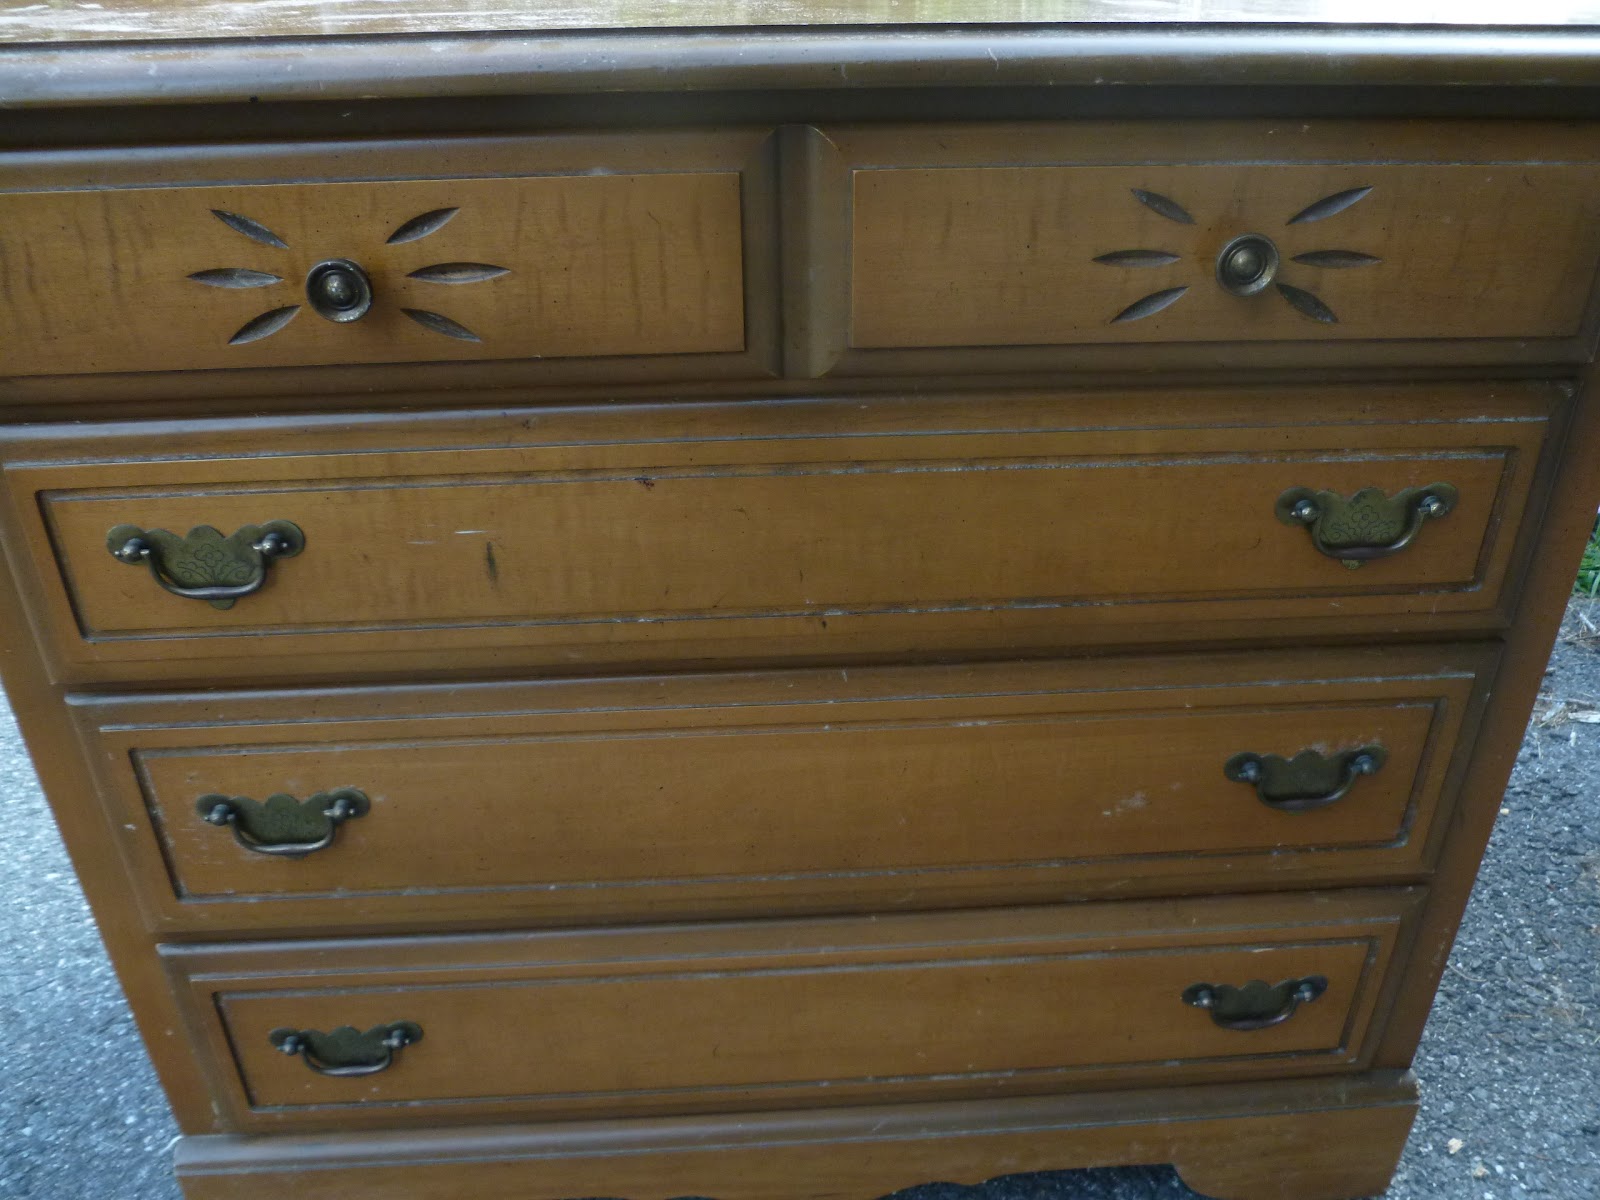
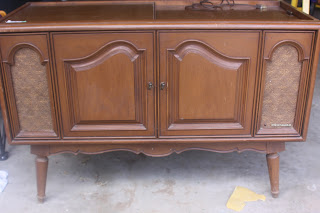
Our Goodwill store was recently renovated and had a huge grand reopening over Labor Day weekend.  It was much more organized and had a lot more to offer.  Rob spotted this stereo cabinet for $20 and told me he was going to get it. He said it he wanted to turn it into a toy box for Wynn, and I was excited to get more storage for the growing toy collection.  Here is the cabinet after we brought it home. It was not in bad shape at all and I really liked the legs on it. 

The record player was still in tact and even had a Mel Tillis 45 inside. I had to ask my neighbor what those small records were called because I had forgotten. He said that really shows my age. 

Rob decided to sand it down and disassemble it completely.  Goodbye record player! He used the color Posh Red by Valspar, which we had used on a previous project for Wynn's toy locker.  We then added fabric in the spaces where the speakers were at first to fill it in.

Now we have a piece to match the Toy Locker that we completed for her a few months ago.
Then added a bit of fabric where the speakers were previously.  We had paint left over from the toy locker so we did not need to buy anything except the actual stereo cabinet.

It will be perfect for storing all these toys we seems to be accumulating around here.  Wynn has found it easy to slide the top open and reach in to get to her toys.

Thanks for stopping by!

Megan


Monday
Alderberry Hill
The Gunny Sack
The Dedicated House
Adventures of a DIY Mom 
Home Stories A to Z
Tip Junkie
Todays Creative

Tuesday
A Diamond in the Stuff
Elizabeth & Co
Romance on a Dime
The NY Melrose Family
The DIY Dreamer
Claiming Our Space
The Winthrop Chronicles
Full Circle Creations
Pincushion Creations
Primitive & Proper

Wednesday
Polkadots on Parade
Southern Lovely
We Like To Learn As We Go
The Shabby Creek Cottage
Someday Crafts
High Heels & Grills
Mom on Timeout

Thursday
The Taylor House
At The Picket Fence
Live Laugh Rowe
A Glimpse Inside
Seven Alive
52 Mantles
Fireflies and Jellybeans
Bloom Designs
House of Hepworths
Momnivores Dilemma
Western Warmth
Saving 4 Six

Friday
504 Main
Redoux Interiors
Craftionary
The Grant Life
Just Us Four
Thrifty Handmade Days
Tatertots & Jello
Fresh Eggs Daily

Saturday
Too Much Time On My Hands
Tutus and Tea Parties
Classy Clutter
Its Overflowing

Sunday
Nifty Thrifty Things
Flamingo Toes
Twigg Studios
C.R.A.F.T.
My 1929 Charmer
Brassy Apple 
Impatiently Crafty

Saturday, September 8, 2012

First Attempt at Glazing Furniture

My parents gave us one of the dressers that they received for a wedding gift almost thirty five years ago. Rob was interested in trying out an antique glaze on this dresser and another pine dresser we snagged off of Craigslist.  Unfortunately we only have before pictures of the first dresser because we forgot to take one of the one from Craigslist. The CL dresser was dark wood with lots of scratches all over it.


Here are the finished photos for both dressers. Rob used Valspar's antiquing glaze in the asphalt color and Valspar's Homestead Resort Olive.  Both dressers were sanded with a hand sander and then wiped down with mineral spirits to clean them up.  The hardware was left alone on both pieces for now. Then Rob put three coats of paint on both dressers and distressed them both by hand. Finally, he added the antiquing glaze by wiping it on and then wiping some of it off with a towel.  


The paint and glaze set us back about twenty dollars at Lowe's.  The cost to complete both dressers was around fifty dollars because we bought the second one on CL. Thanks for stopping by!

Megan

We enjoy linking up to:

Monday
Alderberry Hill
Etcetorize
The Gunny Sack
The Dedicated House
Adventures of a DIY Mom 
Home Stories A to Z

Tuesday
A Diamond in the Stuff
Elizabeth & Co
Romance on a Dime
The NY Melrose Family
Simply Done Wright
The DIY Dreamer
Claiming Our Space
The Winthrop Chronicles
The Kurtz Corner
Primitive & Proper

Wednesday
Polkadots on Parade
Southern Lovely
We Like To Learn As We Go
The Shabby Creek Cottage
Someday Crafts

Thursday
The Taylor House
At The Picket Fence
Live Laugh Rowe
A Glimpse Inside
Seven Alive
52 Mantles
Fireflies and Jellybeans
Bloom Designs
House of Hepworths
Momnivores Dilemma

Friday
504 Main
Redoux Interiors
Raising Oranges
Craftionary
The Grant Life
Just Us Four
Thrifty Handmade Days
Tatertots & Jello

Saturday
Too Much Time On My Hands
Tutus and Tea Parties
Classy Clutter
Its Overflowing

Sunday
Nifty Thrifty Things
Flamingo Toes
Twigg Studios
C.R.A.F.T.
My 1929 Charmer
Brassy Apple

Monday, August 27, 2012

Reupholstered Stool by Amy & Chris

My friend was getting rid of a lot of furniture and she gave me a stool for free! I knew I could redo and use it in some way. It has been sitting in our garage for months because life has been so crazy, but I finally decided its time to complete the project.


Before...


The top cushion was not attached so I threw it away and started from scratch. I primed the stool and then painted.
I then started the put the top of the stool together. I found a small piece of wood at Home Depot, I placed the foam on top and then the fabric. Once everything was stapled, I attached the decorative nails around the border of the cushion. The final step was to nail the cushion to the stool.

After... 


The total cost of this project was around $20.
Thanks for stopping by I hope you enjoy!

Amy & Chris

We enjoy linking up to:


Monday
Alderberry Hill
Etcetorize
The Gunny Sack
The Dedicated House
Adventures of a DIY Mom 
Home Stories A to Z

Tuesday
A Diamond in the Stuff
Elizabeth & Co
Romance on a Dime
The NY Melrose Family
Simply Done Wright
The DIY Dreamer
Claiming Our Space
The Winthrop Chronicles
The Kurtz Corner

Wednesday
Polkadots on Parade
Southern Lovely
We Like To Learn As We Go
The Shabby Creek Cottage
Someday Crafts
Simply Done Wright

Thursday
The Taylor House
At The Picket Fence
Live Laugh Rowe
A Glimpse Inside
Seven Alive
52 Mantles
Fireflies and Jellybeans
Bloom Designs
House of Hepworths
Momnivores Dilemma
Two Sasters

Friday
504 Main
Redoux Interiors
Raising Oranges
Craftionary
The Grant Life
Just Us Four
Thrifty Handmade Days
Tatertots & Jello

Saturday
Too Much Time On My Hands
Tutus and Tea Parties
Classy Clutter
Its Overflowing

Sunday
Nifty Thrifty Things
Flamingo Toes
Twigg Studios
C.R.A.F.T.
My 1929 Charmer
Brassy Apple


Sunday, August 19, 2012

Play Kitchen Out of TV Stand

I saw a bunch of kitchens out of TV stands last summer on Pinterest.  I knew I wanted to make one for Wynn. Obviously this was before I had a blog to share it on, so I thought I'd share it now.  I purchased this TV stand for $5 from someone only a few minutes away. 
 I grabbed some returned paint at Home Depot for $5 bucks and a bowl from Big Lots for $2.  Rob cut a hole in the top to make space for the bowl, which became the sink. I grabbed some coordinating fabric on clearance from Jo-Ann's to have my mom make a curtain for the front.
 I used some other leftover paint from Home Depot to paint on some burners. I got the knobs from Home Depot as well. I used a faucet that I bought on clearance at Lowe's a few years back to place on top.
 With a curtain rod I attached the cute curtain my mom made for the front of the kitchen.  I left the bottom open so that all the food could go in a basket below.
 When my boss heard about this project he bought Wynn all the kitchen accessories at Ikea he could find. Including these cute pans for her stove.
I painted the sides of the stand with green chalkboard paint to go along with the green in the fabric and the sink.  The basket below contains all the play food that she drags around the house.


The entire project cost around $75 and that was because of the quart of chalkboard paint. It was the most costly item in the project.  She loves her kitchen and plays it with all the time. I know I could have bought a play kitchen for the same price at Target or somewhere, but I like how this is unique.  

Megan

We enjoy linking up to:

Fox Hollow Cottage

Monday
Alderberry Hill
Etcetorize
The Gunny Sack
The Dedicated House
Adventures of a DIY Mom
Home Stories A to Z
Tip Junkie

Tuesday
A Diamond in the Stuff
Real Housewives of Riverton
Elizabeth & Co
Romance on a Dime
The NY Melrose Family
Simply Done Wright
The DIY Dreamer
Claiming Our Space
The Winthrop Chronicles
The Kurtz Corner

Wednesday
Polkadots on Parade
Southern Lovely
We Like To Learn As We Go
The Shabby Creek Cottage

Thursday
At The Picket Fence
Live Laugh Rowe
A Glimpse Inside
Seven Alive
52 Mantles
Fireflies and Jellybeans
Bloom Designs
House of Hepworths
Momnivores Dilemma
Two Sasters

Friday
504 Main
Redoux Interiors
Raising Oranges
Craftionary
The Grant Life
Just Us Four
Thrifty Handmade Days
Tatertots & Jello

Saturday
Too Much Time On My Hands
Tutus and Tea Parties
Classy Clutter
Its Overflowing

Sunday
Nifty Thrifty Things
Flamingo Toes
Twigg Studios
C.R.A.F.T.
My 1929 Charmer
Jam's Corner
Brassy Apple

Tuesday, August 7, 2012

Family Room Feature by Kirsten and Bobby

My friends recently updated their finished basement. I asked if they would mind sharing it here on our blog and they agreed! Take it away, Kirsten! :)

Thank you to Megan and Our Pinteresting Family for featuring this basement re-do on your blog. We are very honored, and excited to share our project!  Here a sneak peek:
The basement was already finished when the house was purchased in 2010. It had carpet, butter yellow walls, and a red accent wall. This was not in keeping with the style of the rest of the house, but it was functional. The space was not furnished, so it wasn’t used much anyway. Originally, we were going to paint the basement a more earth-toned color and call it a day! But, we were inspired along the way to make this a space we truly love!
Here is Bobby—a home improvement contractor by trade. He worked on this basement during evenings and weekends throughout the spring and summer.  In this picture, we were just getting started. Bobby was able to obtain wood “scraps” from a good friend. There were enough of these good quality pine pieces to create wainscoting for the entire basement.  Bobby cut each piece to 38 inches in height and beveled the edges for a more refined look. Cost: $0 J 

Bobby, my Dad, and I then laid out the boards of random-sized widths across each wall. The boards were then nailed in place with a pneumatic nailer. We used putty to fill the small nail holes. Bobby added two places for light fixtures and a new wall switch, too!
In this picture, you can see what the boards looked like as we progressed around the room.  We primed the boards prior to painting them. This was raw wood, so it soaked up a lot of paint!
There was enough wood to add the same beveled edge wainscoting to the recessed accent wall that used to be red. Bobby then spent time creating built-in shelving. We did purchase three sheets of cabinet grade plywood for this shelving. The trim for the shelving was cut and sanded from the same wood that we used for the wainscoting and the back of the book shelf. Cost of plywood: $ 45 per sheet
There was no better time to change the flooring than during this project!  We came across a large quantity of well-priced  tile at Lowes. This was part of a discontinued lot from Interceramic, and is regularly priced at $4.50 per square foot. We got it for $1.98 per square foot! The tile is a dark chestnut color with a hand-scraped finished for texture. Laying tile is a regular part of Bobby’s everyday work, and he is quite good!  So, I didn’t help at all during this phase. I was strictly a cheerleader! Cost for 440 square feet of tile, thinset, and grout: $ 1100
Now is a good time to meet Wendell and Remington! They were the most influential factors in deciding to go with tile floors. Puppy proofing is important these days!
In this picture, you can see the new paint for the walls and wainscoting. To save money, we trimmed the top of the wainscoting with wood that was ripped and sanded from the recycled wood. We used two coats of Valspar’s Mark Twain Olive paint in a flat finish on the walls, and three coats of Olympic Ultra White Semi-gloss paint for the wainscoting and shelving.  We also painted the ceiling in two coats of Valspar’s Flat White ceiling paint. Cost for paint: Approximately $220
We also replaced all switches, receptacles and cover plates to match the white wainscoting and trim. Two outdoor lighting fixtures and two ceiling fixtures were added to the room, as well. Cost of electric supplies and light fixtures: $175  Here are the pictures of the finished space! We are so happy with how things turned out!


Thank you for taking the time to look at our project! J
Total Cost: Approximately $1630
Related Posts Plugin for WordPress, Blogger...